
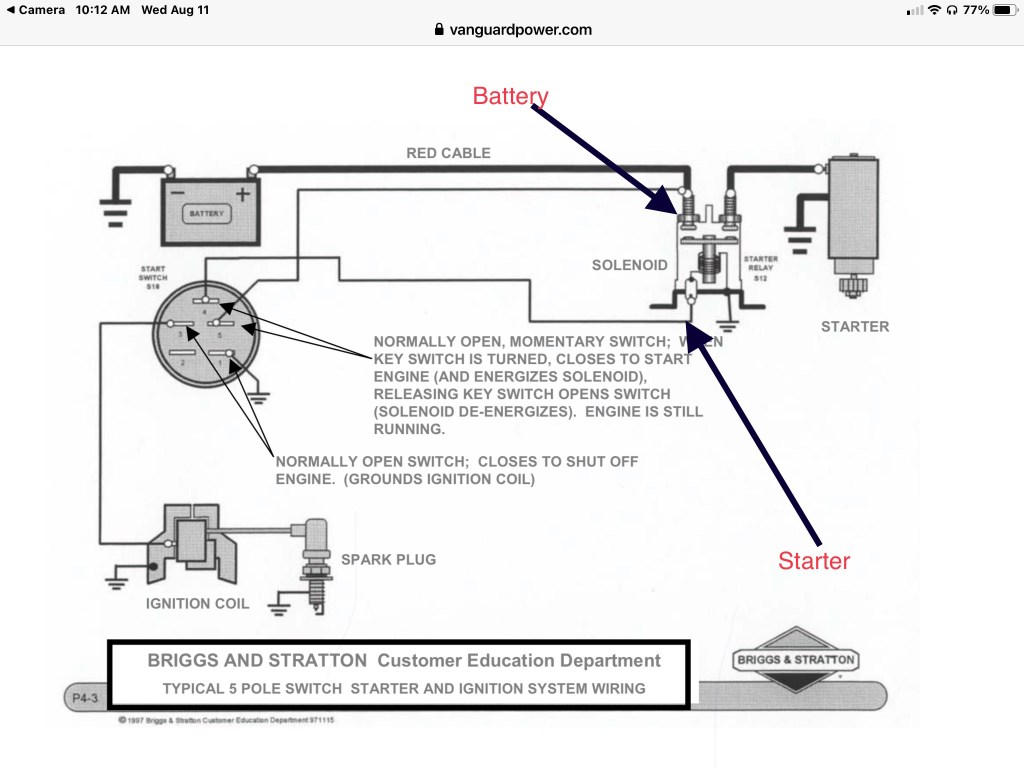
On it’s way! Black wire is ground, red to the coil, the other two blue and yellow to the electric start relay.
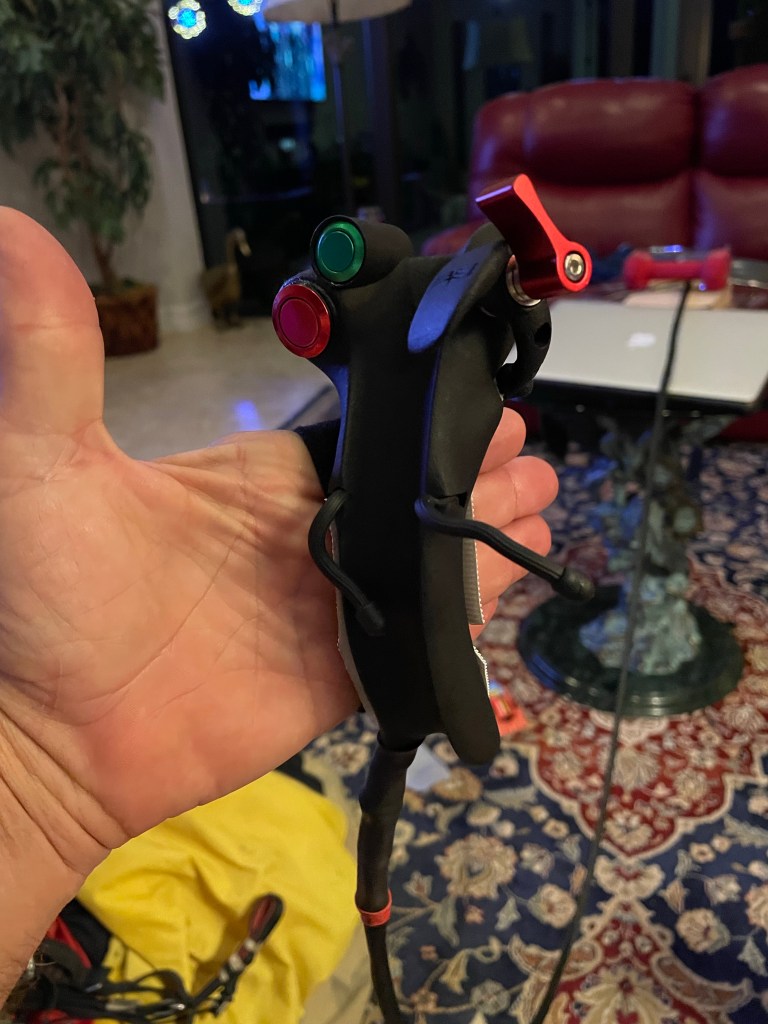
My first impression was, “this is too big for my hands. I couldn’t reach all the buttons and controls unless I could changed hand position on the fly.
But… The biggest issue on my mind, was that, the throttle was going to be integrated into the brake handle. Which meant, that, I wouldn’t be able to modulate the motor while using the WTS.
And… With my current wing, (APCO LIFT EZ), the WTS is what you use when in reflex mode. The brakes are forbidden and using them in Reflex could cause a collapse. I suppose, I could hang up the brakes, set the RPM and fly but it would be a different style of flying. There would be no backing off the throttle coming out of a hard turn to dampen the bounce or adding power to steepen the bank. Perfect for X-country but not for high speed banking and cranking.
How hard would it be to disengage the brake lever to use the WTS? It would probably mean another strap to attach the throttle to the hand, the same as a conventional set-up.
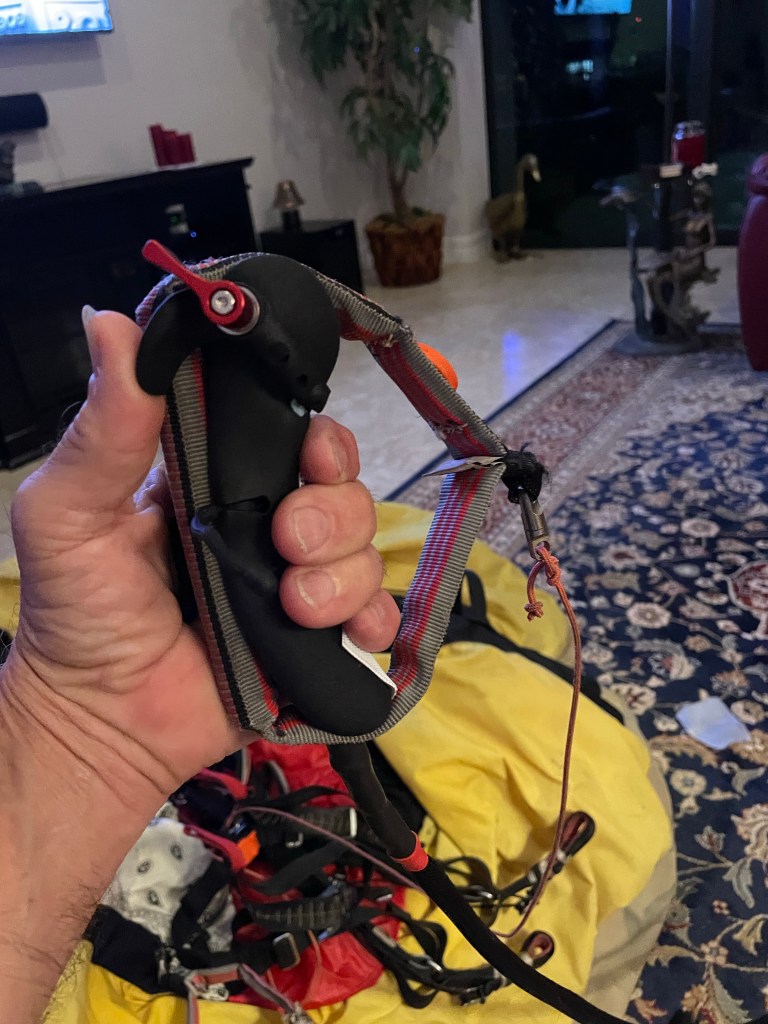
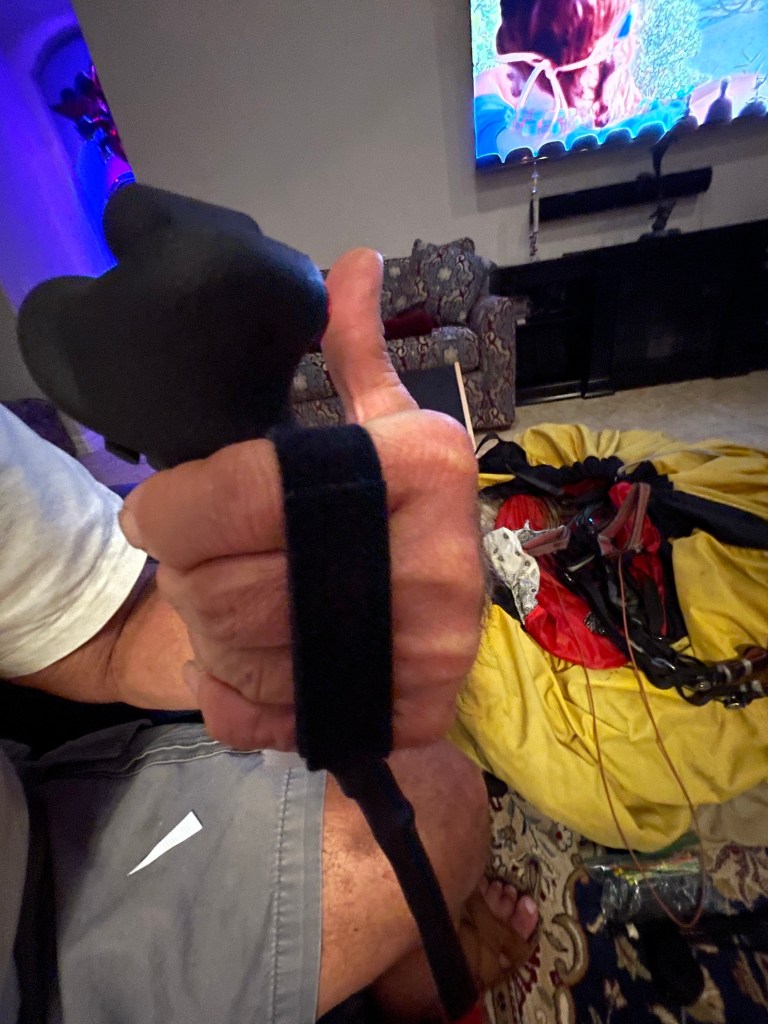
I fashioned a strap using one wrap and an adhesive backed piece of “male” Velcro attached to the body of the throttle. Moving the strap around the handle I was able to find the sweet spot that put all the controls within easy reach.
The twist ties are not necessary. The brake handle nestles into its groove nicely. I don’t think the throttle would fall out of the brake toggle, even if it were hung in the risers. Yet… it can be removed easily, allowing the pilot to go to the WTS.
Day 2
This morning after a nice sunrise flight, I started the swap. After a trip to the hardware store and a few bruised knuckles, I was ready to test it…
First attempt was a huge success. It started right up and the kill switch worked. The second attempt was a disaster. It took awhile to figure it out. What happened was, the start button failed and stuck in the start position. I think the machine is alright, the starter was red hot but I was able to pull the battery cable before it burned. I spent the next hour removing the throttle. I wanted to reinstall the old throttle but it needs a new brake cable that won’t be available until tomorrow.
Day 3
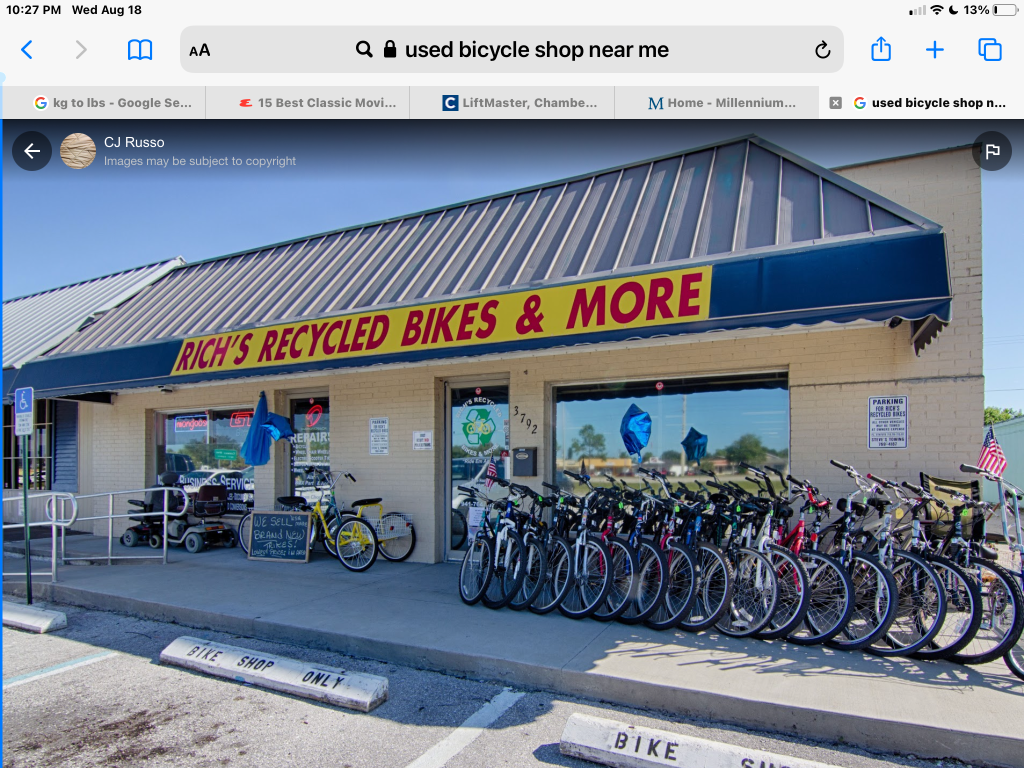
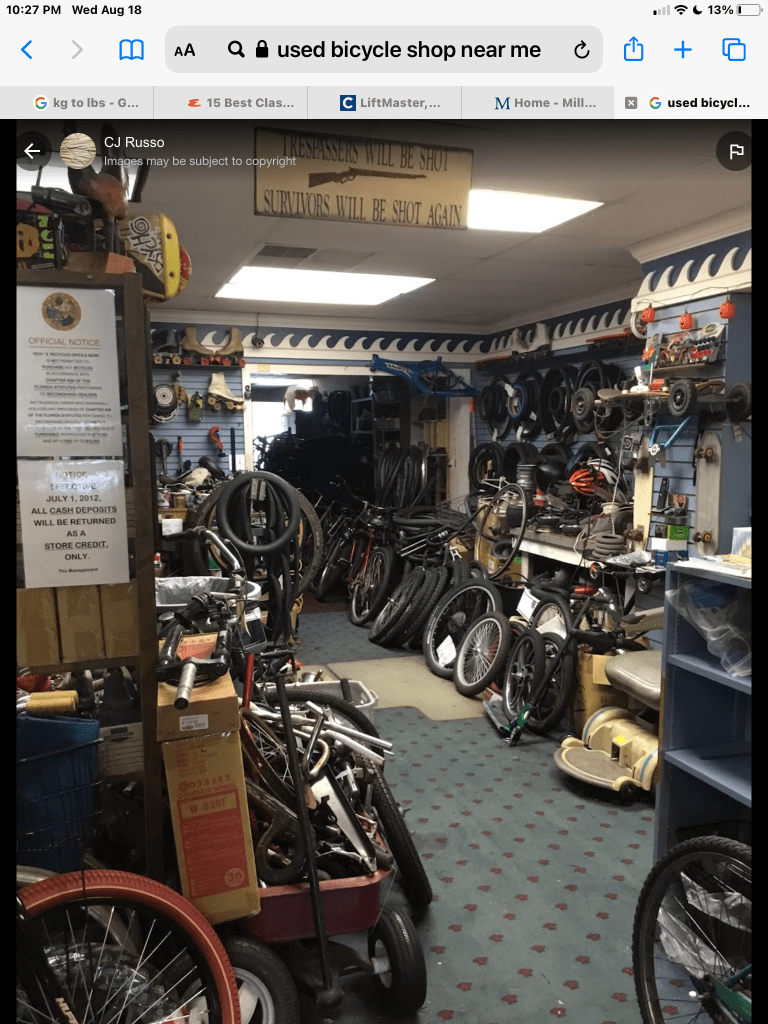
Today, I reinstalled the original throttle and happily the starter works. I was able to find a 5’ cable and housing, at, “Rich’s used bike shop, across the street from the new Trek/Bicycle Center. So now, at least, I’ll have full extension with my left hand. I don’t think I’ll be able to reach my reserve but everything else.
Another silver lining from this “field trial” was discovering Rich’s Bike shop. It is so old school!
OMG … IT was like the good old days of Pettee Cycle. I was instantly transported back 35 years to when I was an independent rep to the industry. I introduced myself, disclosed that I was an old J&B Rep. and …
we were off to the races. Instantly we were brothers of the wrench. Richard showed me around his shop and …. Low and behold … they also do small wheels. Go carts, wheelchairs, novelty vehicles and…. Ultralights. I’ve finally found my wheel and tire guy. The next project is going to be new rear wheels and eventually a front brake.
Day 4
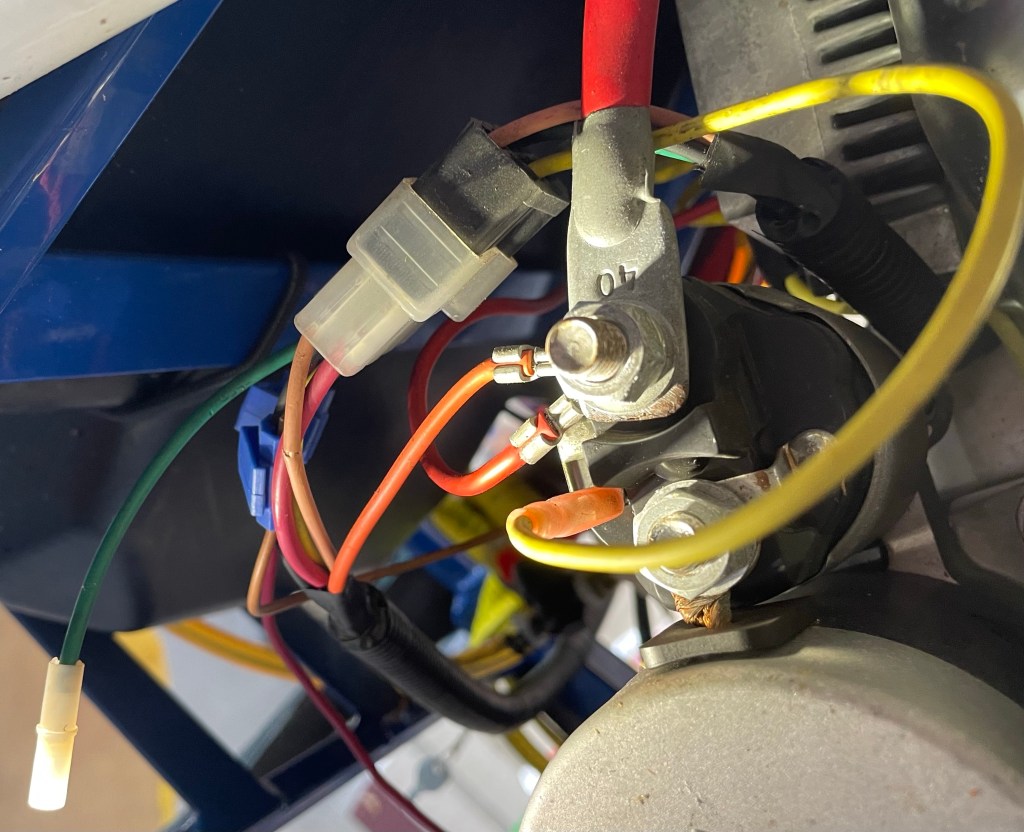
Today I spoke with Terry and we figured out what caused the problem. Instead of two wires attached to both posts on the starter I just néed one wire attached to the post between the solenoid and the relay. What I had done was run a direct circuit through the button and the battery. We welded the button in the closed position. I’m going to try it with the SkyTec throttle and see what happens.
To be continued…

You must be logged in to post a comment.